When you think about ways to decarbonize, your mind will likely go straight to shiny new machines — an electric vehicle, solar panels, or an induction stove, perhaps. But let’s not forget the low-tech, low-hanging fruit: your home itself.
Adding insulation, fixing any gaps, cracks or leaks where air can get out, and perhaps installing energy efficient windows and doors are the necessary first steps to decarbonizing at home — though you may also want to consider a light-colored “cool roof,” which reflects sunlight to keep the home comfortable, and electric panel and wiring upgrades to support broader electrification efforts.
Getting started on one or multiple of these retrofits can be daunting — there’s lingo to be learned, audits to be performed, and various incentives to navigate. Luckily, Heatmap is here to help.
THE EXPERT PANEL
Cora Wyent is the Director of Research at Rewiring America, where she conducts research and analysis on how to rapidly electrify the entire economy.
Joseph Lstiburek is the founding principal at the Building Science Corporation, a consulting firm focused on designing and constructing energy efficient, durable, and economic buildings.
Lucy de Barbaro is the founder and director of Energy Efficiency Empowerment, a Pittsburgh-based organization that seeks to transform the home renovation process and help low and middle-income homeowners make energy efficiency improvements.
OVERVIEW OF THE PROCESS
THE BASICS
- The whole process you’re about to embark on is known as weatherization or weatherproofing. Essentially what you’re doing is sealing off your home, so that whatever’s going on outside has little to no effect on the conditions inside.
- When contractors refer to your home envelope, they’re talking about anything related to your home’s exterior, including the roof, walls, floors, windows, and doors. You may hear many energy efficiency upgrades referred to as “home envelope upgrades,” as well.
- U-Value or U-Factor is a measurement of how well a window, door, or skylight insulates. The lower the U-Value, the better insulating these products are.
- How much heat passes through a window, door, or skylight and into the home is quantified as the solar heat gain coefficient, or SHGC, on a scale of zero to one. Lower SHGC values are better for hot climates and higher values are better for cold climates.
- The higher the R-value of a particular insulation material, the more effective it is. What R-Value you go with will depend on the climate you live in, what part of the house you are insulating, and whether any insulation already exists.
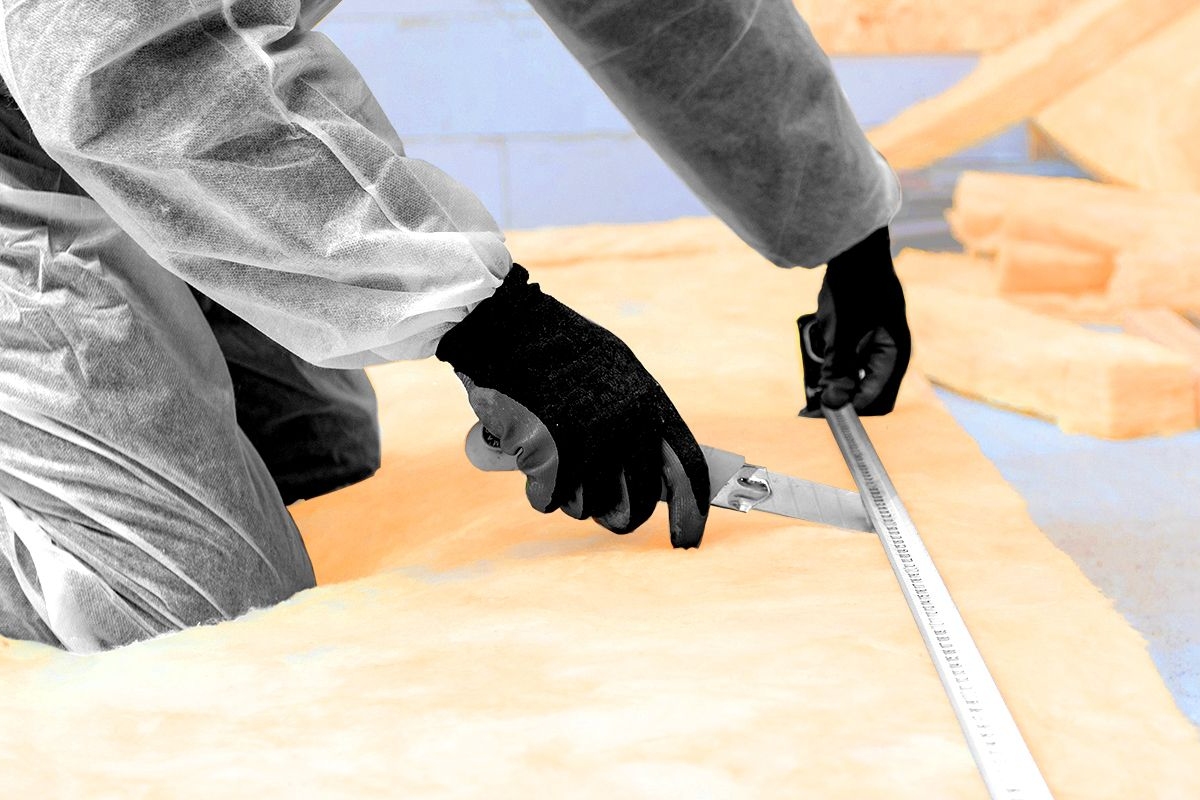
- Dense packing is an insulation method also known as “drill and fill,” which refers to blowing loose fiber insulation into a wall at high pressure. For homes that are already built, many experts recommend using dense pack cellulose insulation, as it’s cheap, effective, and environmentally friendly.
- Roofs covered in light-colored roofing materials to reflect sunlight away from the home are known as cool roofs. They reduce the amount of energy it takes to cool your home on a hot day, but increase the energy needed to heat your home in the winter.
- A roof’s ability to return solar heat to the atmosphere is measured by its Solar Reflectance Index. Most roofing materials have an SRI value between 0 and 100 (higher numbers indicate better performance), although it’s possible to have values outside this range. This number is a combination of two measurements, “solar reflectance” and “thermal emittance.” When comparing roofing products, the SRI is the main thing to check.
- When choosing insulation, doors, windows, etc., you’ll need to know your climate zone, which is essentially what the weather is like in the area where you live, based on temperature, humidity, and rainfall. The zones that pertain to insulation and cool roofs are more specific than the zones for windows, doors, and skylights.
- The amount of electric current moving through a circuit is measured in amps, short for amperes. You’ll hear this used when discussing electrical upgrades. For example an 100-amp panel represents the maximum amount of current your home can handle at any given moment.
- An electrical load refers to any device or appliance that consumes electricity, and by proxy, the amount of power required to run it. It is measured in watts. So an EV charger could be a 7,200 watt load, and a dishwasher could be about 2,000 watts. When discussing electrical upgrades, you’ll likely hear about the load on a particular circuit.
FREQUENTLY ASKED QUESTIONS
1. Do I still need insulation if I live in a warm climate?
Definitively, yes! When people hear the word “insulation” they often think of how it can protect them from the cold. And while it certainly does do that, insulation’s overall role is to slow the transfer of heat both out of your home when it’s chilly and
into your home when it’s hot. That means you won’t need to use your air conditioning as much during those scorching summer days or your furnace as much when the temperatures drop.
2. Would I benefit from energy efficient upgrades if my home is relatively new?
Quite possibly! The most definitive way to know if your home could be improved by weatherization is by getting a home energy audit —- more on that below. While a specific level of insulation is required for all newly constructed homes, these codes and standards are updated frequently. So if you’re feeling uncomfortable in your living space, or if you think your heating and cooling bills are unusually high, it’s definitely worth seeing what an expert thinks. And if you’re interested in getting electric appliances like a heat pump or induction stove, some wiring upgrades will almost certainly be necessary.
3. I already have energy efficient appliances in my home, so what’s the benefit of weatherization?
Energy efficient appliances like electric heat pumps or induction stoves are fantastic ways to decarbonize your life, but serve a fundamentally different purpose than most of the upgrades that we’re going to talk about here. When you get better air sealing, insulation, windows, or doors, what you’re doing is essentially regulating the temperature of your home, making you less reliant on energy intensive heating and cooling systems. And while this can certainly lead to savings on your energy bill and a positive impact on the environment at large, these upgrades will also allow you to simply live more comfortably.
BEFORE YOU GET STARTED
1. Get a home energy audit
This is the starting point for making informed decisions about any energy efficiency upgrades that you’re considering. During a home energy audit, a certified auditor (sometimes also referred to as an energy assessor or rater or verifier) will inspect your home to identify both the highest-impact and most cost-effective upgrades you can make, including how much you stand to save on your energy bills by doing so.
Wyent told me checking with your local utility is a good place to start, as many offer low-cost audits. Even if your utility doesn’t do energy assessments, they may be able to point you in the direction of local auditors or state-level resources and directories. The
Residential Energy Services Network also provides a directory of certified assessors searchable by location, as does the Department of Energy’s Energy Score program, though neither list is comprehensive.
Audits typically cost between $200 and $700 depending on your home’s location, size, and type, as well as the scope of the audit. Homeowners can claim 30% of the
cost of their audit on their federal taxes, up to $150. To be eligible, make sure you find a certified home energy auditor. The DOE provides a list of recognized certification programs.
Important:
Make sure the auditor performs both a blower door test and a thermographic inspection. These diagnostic tools are key to determining where air leakage and heat loss/gain is occurring.
Important!
At the end of the audit, your auditor should provide you with a written report that includes their business employer identification number as well as an attestation that they’re certified by a qualified certification program.
Keep this for your tax records!
2. Learn about incentives
Your energy audit isn’t the only thing eligible for a credit.
The 25C Energy Efficient Home Improvement Credit allows homeowners to claim up to 30% of the cost of a variety of home upgrades, up to a combined total of $1,200 per year. This covers upgrading your insulation, windows, doors, skylights, electrical wiring, and/or electrical panel. Getting an energy audit is also included in this category.
While $1,200 is the max amount you can claim for all retrofits combined, certain renovations come with their own specific limitations. Let’s break it down:
- Insulation and air sealing: 30% up to $1,200 total, no additional limits. Labor costs don’t apply.
- Exterior doors: 30% up to $250 per door, total limit of $500 for all doors combined. Labor costs don’t apply.
- Exterior windows/skylights: 30% up to $600 total. Labor costs don’t apply.
- Electrical upgrades: 30% up to $600 total for panelboards and other electrical equipment with a capacity of at least 200 amps. Needs to be installed in tandem with other energy efficiency upgrades or qualifying energy appliances (such as a heat pump or central air conditioner). Labor costs do apply for the credit.
- Home energy audit: 30% up to $150.
- Roof: Currently, roof upgrades are not eligible for this tax credit or other federal incentives.
Example: If you spend $500 on one door, 30% of that, or $150, is eligible for a tax credit. If you spend $2,000 on two doors, only $500 will be eligible.
State and local incentives:
- The Biden administration is in the process of funding the state-administered Home Electrification and Appliance Rebates, which provide low and moderate income households with up to $1,600 for weatherization upgrades, $4,000 for electric panel upgrades, and $2,500 for electric wiring upgrades. So far, rebate programs have been launched in New York and Wisconsin. Your state could be next!
- The Home Efficiency Rebates are another state-administered program that will reward retrofits based on their modeled or measured level of energy savings. They are expected to roll out in 2025.
- One program that is active today for low-income homeowners and renters is the Weatherization Assistance Program, which provides free weatherization services to qualifying families and individuals. If you think you might be eligible, definitely check it out.
- For cool roofs specifically, you can consult this list of state and local-level rebates and other incentives.
Depending on where you live, there may be additional state and local incentives, and we suggest asking your contractor what you are eligible for. But since incentive programs change frequently, it’s a good idea to do your own research too. Get acquainted with
Energy Star, a joint program run by the Environmental Protection Agency and the DOE which provides information on energy efficient products, practices, and standards. On Energy Star’s website, you can search by zip code for utility rebates that can help you save on insulation, windows, and electrical work.
“Starting by looking at your local utility programs can be a great resource too, because utilities offer rebates or incentives for weatherizing your home or installing a new roof,” said Wyent.
3. Consider your long-term goals
Everyone wants to minimize the number of times they break open or drill into their walls. To that end, it’s useful to plan out
all the upgrades you might want to get done over the next five to 10 years to figure out where efficiency might fit in.
Some primary examples: Installing appliances like a heat pump, induction stove, or Level 2 EV charger (all of which you can read more about in our
other guides) often require electrical upgrades. Even if you don’t plan to get any of these new appliances now, pre-wiring your home to prepare for their installation (with the exception of a heat pump — see our heat pump guide for more info on that) will save you money later on.
De Barbaro also notes that if you’re planning to repaint your walls anytime soon, this would also be a convenient time to add insulation, as that involves drilling holes which then need to be patched and repainted anyway. Likewise, if you were already planning to replace your home’s siding, this would be a natural time to insulate. Finally, if you’re planning to get a heat pump in the coming years, getting better insulation now will ensure this system is maximally effective.
Conversely, if you’re cash-strapped, spreading out electrical and weatherization upgrades over the course of a few years allows you to claim the full $1,200 tax credit every year. Whether those tax savings are enough to cover the added contractor time and clean-up costs, though, will depend on the particulars of your situation.
“Come in with a plan and talk to the contractor about everything that you want to do in the future, not just immediately,” said Wyent.
FINDING A CONTRACTOR OR INSTALLER
Unlike solar installers, which are often associated with large regional and national companies, the world of weatherization and electrical upgrades is often much more localized, meaning you’ll need to do a bit of legwork to verify that the contractors and installers you come across are reliable.
Wyent told me she typically starts by asking friends, family, and neighbors for references, as well as turning to Google and Yelp reviews. Depending on where you live and what type of work you want done, your local utility may also offer incentives for weatherization and electrification upgrades, and can possibly provide a list of prescreened contractors who are licensed and insured for this type of work.
What to ask all contractors and installers
These questions will help you vet contractors and gain a better understanding of their process regardless of the type of renovation you’re pursuing.
- How long have you been in business? If you’re hiring a local company, you’ll want to ensure that they’ve been around long enough to establish a reputation. That way you can gather references and ask friends and neighbors if they’ve worked with them before.
- What is the timeline for completion of this project, and when would you be able to start? This will vary widely by project type and scope, but you should ask your contractor to include a timeline as a part of their initial quote — and, most importantly, as a part of your final contract, if you get there. Having this in writing should help keep everyone accountable.
- What is your expected work schedule, and can I stay in my home during these renovations? Certain projects can be loud and disruptive, even if only for a few hours. Gauging just how disruptive can allow you to plan ahead and get out of the house if need be.
- What type of warranty do you offer for your work? This ensures that if a renovation is performed incorrectly, it will be fixed free of charge. The products themselves have their own separate warranties, which you should also be aware of.
- Will you work with subcontractors? Clarify who is your point of contact for the project, and make sure the contractor’s insurance covers subcontractors as well.
- Will these retrofits require a permit? If so, who will be in charge of securing that? Depending on where you live and what types of retrofits and upgrades you’re planning, obtaining a permit might be necessary. Ensuring that your contractor understands the nuances of local regulations and permitting processes is key.
- What is your payment schedule? Often you may be expected to pay a contractor or installer an upfront deposit. Clarify how much that will be to make sure there are no surprises, and stay away from contractors who request full payment upfront.
- Will you conduct a site visit in order to get a more accurate cost and scope of work estimate? This can help you and your contractor or installer ensure that you’re on the same page about what makes the most sense for your home. Ask whether the site visit will be free or if there’s a consultation fee.
- Will you use products and materials that are eligible for the Energy Efficient Home Improvement Credit? You’ll want to let your contractor know up front that you would like to take advantage of this credit so that you can work with them to choose products that meet the required standards.
- Do you know of any state or local energy efficiency incentives I might be eligible for? Make sure you’re taking advantage of all the cost savings available to you! Not all contractors will be up to date on the latest programs, though, so do your own research.
Common wisdom says you should
always get three quotes. But that doesn’t mean you should automatically choose the cheapest option. Lstiburek says the old adage applies: “If it sounds too good to be true, it's probably too good to be true.” Be sure that your contractors and installers are properly licensed and insured and read the fine print of your contract. Beyond this, how to find qualified professionals and what to ask largely depends on the type of upgrade you are pursuing. So let’s break it down, starting with the biggest bang for your buck.
Air Sealing and Insulation
Air sealing and insulating your home is usually the number one way to increase its energy efficiency.
Energy Star says nine out of 10 homes are underinsulated, and many also have significant air leaks. In general, homes lose more heating and cooling energy through walls and attics than through windows and doors, so air sealing and adding insulation in key areas should be your first priority.
“People don't realize how collectively, small holes everywhere add up. So on average here in Pennsylvania, typically those holes would add up to the surface of three sheets of paper, continuously open to the outdoors,” said de Barbaro.
Determining where air is escaping is the purpose of the
blower door test and the thermographic inspection, so after your energy audit you should have a good idea of where to begin with these retrofits. This guide from the Department of Energy is a great resource on all the places in a home one might consider insulating.
Choosing an insulation type:
Every home is different, and the type of insulation you choose will depend on a number of factors including where you’re insulating, whether that area is finished or unfinished, what R-Value is right for your climate, and your budget. You can check out
this comprehensive list of different insulation types to learn about their respective advantages and use cases. But when it comes to attic rafters and exterior walls, De Barbaro said that one option rises above the rest.
“The magic word here is dense-packed cellulose insulation!” De Barbaro told me.
This type of insulation (which falls under the “loose fill and blown-in” category) is made from recycled paper products, meaning it has very low embodied carbon emissions. It’s also cheap and effective. For exterior walls and attic rafters, be sure to
avoid loose-fill cellulose, as that can settle and become less effective over time — although for attic floors, loose-fill works well. Both are installed by drilling holes into the wall or floor space and blowing the insulation in under pressure.
We recommend discussing all of these options with your contractor, but here are the other materials you’re most likely to come across:
- Exterior walls: For some climate zones, Energy Star recommends adding “insulative wall sheathing” to your blown-in insulation. This usually means adding foam board or rigid foam insulation beneath your siding. In this case, De Barbaro recommends Polyiso rigid foam insulation, due to its low environmental impact. Removing your siding is a big, expensive task, though, so you would likely only add this additional layer if you were planning to replace your siding anyway.
- Basement or crawlspace: Energy Star recommends either insulative wall sheathing (again, Polyiso is a great choice), or batt insulation. Batts are pre-cut, flat pieces of insulation that look like a blanket and are usually made of fiberglass, mineral wool or sheep’s wool.
Finding an air sealing and insulation contractor:
In addition to asking friends, family, and your local utility for contractor recommendations,
Energy Star specifically recommends these additional resources where you can find licensed and insured contractors for insulation work.
Things to know before reaching out to contractors:
- Where in your home you are losing the most heat. The results of your energy audit should give you this information.
- How much insulation you currently have (if any) in your attic floor, exterior walls, and basement or crawlspace. This is also something your home energy auditor can help you figure out.
- What climate zone you are in, and what R-Value is recommended both for that zone and for the part of your house that you are insulating. For wood-framed buildings, which comprise the vast majority of single-family homes, you can find that information here.
- “Knob and tube wiring” found in older homes can pose a fire hazard if it comes into contact with insulation, so tell your contractor if your house was built in the 1930’s or earlier.
Questions to ask potential air-sealing and insulation contractors:
- Will you seal all gaps and cracks before adding insulation? If a contractor doesn’t agree to this, find another one! The benefits of the added insulation will go largely to waste if air sealing isn’t completed first.
- Do your insulation and air sealing materials meet the International Energy Conservation Code standards? This is required to be eligible for tax credits.
- Are you able to install my preferred type of insulation, and is this the type of insulation you would also recommend? It’s good to come in with some ideas and preferences, but listen to what your contractor has to say about what they think would work best for your home too. Get a number of different opinions.
- Do you offer attic hatch cover or attic door insulation? If you’re doing your attic, insulating these areas ensures that you get the most energy savings possible.
Windows, Doors, and Skylights
While air sealing and insulation should definitely be number one on your weatherization checklist, plenty of heat gets lost through windows, doors, and skylights, as well. Single pane glass is a particularly poor insulator, and while fewer houses these days have it, upgrading to
double or triple pane windows or skylights can be a big energy saver. Likewise, steel or fiberglass doors are much better insulators than traditional wooden doors.
But be warned: These can be pricey upgrades. The cost of installing windows alone ranges from hundreds of dollars up to $1,500
per window, and many homes have ten or more. It’s unlikely you’ll fully recoup the outlay through your energy savings, so before going about these retrofits, be sure that you’ve taken care of the easy stuff first.
There are a couple, less expensive alternatives to a full window and door replacement. One is getting
storm windows and
storm doors installed to provide an added layer of insulation. While this option has been around for a long time, older models were usually made of clear glass, while newer versions offer a
low-emissivity (e.k.a.
low-e) coating that greatly improves the glass’s insulating abilities. Installing these yourself can make for a relatively easy
DIY project — or, as always, you can go with a certified professional.
You can also opt for what’s called an
insert window replacement or a pocket window replacement, which is when you replace just the window glass but keep the existing frame. If your frame is in good condition and airtight, this will likely save you money and simplify the installation process.
One last cost saving tip: Don’t sleep on the power of
simple window coverings like
shades or
blinds! They come in a variety of styles and can be powerful insulators, given that you remember to strategically open and close them throughout the day.
Things to know before reaching out to contractors and installers:
- What climate zone you are in, as this will impact the type of windows, doors, and skylights that work for you.
- To be eligible for a federal tax credit, new windows and skylights must be designated “Most Efficient” by Energy Star. The online database lets you filter by climate zone, window or door type, brand, and frame material. While doors don’t need this designation to be eligible for the tax credit, they do have to meet other Energy Star criteria. (Currently no storm windows or storm doors appear to be designated “Most Efficient,” but you can find a list of Energy Star-certified storm windows here.)
- What type of windows and doors you currently have and what type of windows and doors you might want. Familiarize yourself with the various window styles and technologies, and check out the websites of some major manufacturers such as Marvin, Pella, Jeld-Wen, or Anderson to get a sense of what you’re looking for. For storm windows in particular, most Energy Star-certified models are from Quantapanel.
Once you’ve done your research, it’s time to schedule a consultation with an installer, who can help you refine your project needs, discuss design and installation options, and provide you with a quote.
Questions to ask potential contractors or installers:
- Can you show me an example of what we’re talking about? Window installers may be able to bring a corner cut of a window or a full example window to your home so you can assess color and frame style. Doors are more difficult, but if the company has a showroom, it’s a good idea to check that out.
- Who is the manufacturer of these windows/doors/skylights? Installers may show you products from multiple companies, but you’ll want to know the manufacturer and the model so that you can verify that it’s Energy Star certified and eligible for tax credits.
- Are you a certified installer of [insert brand here] windows and/or skylights and/or doors? Major window and door manufacturers such as Marvin, Jeld-Wen, Pella, and Anderson will have a network of certified installers, and once you’ve decided to go with a particular brand, you should ensure that your installer is certified with that manufacturer.
“So if you pick a Marvin window, make sure that you have a Marvin certified installer in your location, installing the Marvin window according to the Marvin instructions.” said Lstiburek.
- How strong is the glass in these windows? Double-strength glass is less subject to breakage and may be worth the slight cost premium, especially because some glass warranties only cover double-strength glass.
- How long will it take for things to be delivered? Know that high performance windows can take up to 12 weeks for delivery, especially if they’re made to order or require any customization. Prepare yourself for a wait.
Roofs
Insulating your attic floor or your roof rafters is the best way to ensure that your home is sealed off from the elements. But if you live in a hot climate and need a new roof anyway (most last 25 to 50 years), then you might consider getting a cool roof, which can be made from a variety of materials and installed on almost any slope. However, they won’t lead to energy efficiencies in all geographies, so be sure to do your research beforehand!
Things to know before reaching out to roofers:
- What climate zone you’re in, and thus how beneficial (or not) a cool roof would be. While a cool roof will be at least slightly beneficial in most climate zones, if you live in a very cold place (zone 7 or 8), a cool roof will probably be detrimental, as the need for more heating when it’s cold will outweigh the energy savings when it’s warm.
- What type of roofing materials and finishes you are interested in. Consult the database of products from the Cool Roof Rating Council to compare the performance of various roofing products based on their Solar Reflectance Index (see glossary above). You can also filter by material, color, manufacturer and roof slope.
- What type of roof you currently have, and what type of roof you might want. Check out homes in your neighborhood similar to get a sense of prevailing styles and what might suit your home. You can also check out the websites of some major roofing companies to see what styles they offer.
- Roofers are also often knowledgeable about the most popular roofing colors and styles for homes like yours, and can be a valuable resource in helping you make your selection.
Questions to ask potential contractors or installers:
- Are you a member of any professional roofing associations? Affiliation with a reputable roofing association is a good sign, indicating that your roofer is staying up to date on industry standards. Along with the National Roofing Contractors Association, there are numerous regional associations including ones for the Northeast, Midwest, Western, and Mid-Atlantic areas.
- Will you bring roofing samples to help me choose what color and style would best suit my home? While looking at products online can be helpful, Heatmap recommends waiting to make a final decision until you can see examples in person.
- Are you associated with a roofing manufacturer or a certified installer for any particular manufacturers? Much like with windows, major roofing manufacturers such as GAF, Owens Corning, or Englert often have a network of roofers who are trained on their particular products. So if you’re interested in purchasing roofing products from a particular manufacturer, choosing a roofer who is affiliated with them is a prudent choice.
- Will you perform a full inspection of my roof? Before providing you with a cost estimate, a roofer should perform a full roof inspection, including your attic, to evaluate the scope of the project and provide you with an accurate quote.
Wiring and Electric Panels
Last but certainly not least is a retrofit that’s a little different from the rest. Unlike getting insulation, new windows, or a new roof, upgrading your wiring or electric panel doesn’t lead to greater energy efficiency by regulating the temperature of your home. What it does instead is enable
greater energy efficiency by making it possible to operate an increasing number of electrified appliances and devices in your house.
For example, getting an electric or induction stove or dryer, a standard heat pump, a heat pump water heater, or an electric vehicle charger will require that you add new electric circuits to support these devices. And as these new loads add up, you may need to install a larger electric panel to support it all.
After sourcing electrician recommendations from family and friends, a good place to turn is
Rewiring America’s contractor directory network. (Rewiring America is also a sponsor of Decarbonize Your Life.)Networks in your area can then provide you with a list of qualified electricians.
Things to know before reaching out to electricians:
- What your long-term home electrification goals are. As previously mentioned, it will save you time and money to do as many electrification upgrades as possible in one go.
- The size of your current electric panel. You can find this information on your main breaker or fuse, a label on the panel itself, or your electric meter. Buying a new electric panel usually costs thousands of dollars, so knowing what size you’re currently working with can help ensure you’re not getting upsold. Typical is 100 amps, and that’s often large enough for homes to fully electrify, Wyent told me; if you’re going to upgrade though, more than 200 amps is almost never necessary.
“Most people are really only using somewhere around 40% of what their current panels space. So you can actually add a fair amount of new circuits to your existing panel and upgrade your wiring while not having to upgrade your panel at all,” Wyent said.
- Even if you are running out of space on your current panel, you don’t necessarily need a new one — there are technologies and methods to work around this. For example, Wyent told me you can purchase circuit sharing devices like a smart splitter or a circuit pauser that would allow you to put multiple loads on the same circuit or shut off certain appliances when you’re approaching your panel’s limit. Or you could get an entire smart panel (though that’s quite pricey), which automatically modulates your loads.
Questions to ask potential electricians:
- Will you need to shut off power and for how long? Most electrical work involves shutting off the power for a bit. Knowing how long this will take, and if the whole house or just particular rooms will be affected will allow you to plan around it.
- Will you perform an electrical safety inspection as a part of the job? These types of periodic inspections are important, and if an inspection isn’t automatically performed as a part of the job, it could be worth tacking it on for an extra charge.
- What technologies would allow me to keep my existing panel while also adding more electrical appliances? As discussed, there are numerous ways to avoid having to upgrade your panel, and you should be able to discuss these options with your electrician.
- If getting a new panel, does this panel meet the standards of the National Electric Code? This is required for federal tax credit eligibility.
REVIEWING OPTIONS AND SIGNING YOUR CONTRACT
Once you have three quotes in hand, all that’s left to do is evaluate your options, choose a contractor or installer, and sign a contract. Cost will likely be a major factor in the decision, but you’ll also want to ensure that the cheapest quote doesn’t mean corners will be cut. Here’s what to look out for.
Pay close attention to warranties. This applies both to the warranty for the work being performed and to the warranties for the products themselves. If an installation job or a product is well priced but comes with a short warranty, this should give you pause.
Avoid “same day signing specials.” If you’re being rushed into signing a contract, this is also a bad sign. Be sure to read the fine print — most cost estimates should be good for a few weeks at minimum.
Get specific. Your quotes should specify the type of work being performed, the scope of the work, cost (broken down by materials, labor, permits, and other expenses), payment method, and a tentative timeline for completion. A quote is much less formal than a contract, so if some of this information isn’t provided up front, don’t hesitate to ask for clarification so that you can make apples-to-apples comparisons between different contractors.
When you get a contract in hand, double check that:
- The materials and products listed are the same as the ones you discussed, that they meet the requirements for your climate zone, and (if relevant) are Energy Star certified.
- There are exact values listed for the relevant metrics. You should see R-Values for insulation, U-Values and SHGC for windows, doors, and skylights, and the Solar Reflectance Index for roofs.
- The payment schedule — including upfront deposits — aligns with your expectations.
- Warranty information for both labor and materials/products is included.
- The timeline is clear, with start and end dates listed.
- The contractor’s license and insurance information is provided.
Then it’s time to sign, sit back, and enjoy the soothing sounds of hammering, drilling, insulation blowing, and wire tinkering, content in knowing that you’re decarbonizing your home down to its very bones!
Important!
Keep all of your invoices and receipts from contractors and installers. You might need this information to claim your federal tax credit or for other state and local incentives. More on that below!
WHAT’S NEXT?
Claim your tax credits
Now that you’re living comfortably in a maximally energy efficient home, you’re probably wondering when you’ll start seeing all those incentives you researched pay off. First off, know that you must wait until all renovations are complete and paid for to claim your federal tax credit. That means that even if you purchased new windows this year, if you have them installed in 2025, you’ll file for a tax credit with your 2025 return. Here’s how to go about it.
- Find the invoice(s) from your contractor(s) for all qualified energy efficient upgrades you made this last tax year.
- Fill out IRS Form 5695, Residential Energy Credits. For more information on filling out the form and a reminder of the amount that you can claim for various projects, see here. Remember that labor costs for insulation, windows, doors, and skylights do not apply. Labor costs do apply for electrical upgrades though.
- When it’s time to file your taxes, submit the form alongside your tax return. Note that you can claim this tax credit and also take the standard deduction, no need to itemize.
- Enjoy your savings!
Note
You cannot receive more money back in tax credits than you owe in taxes. So if you qualify for $900 of home energy efficiency upgrades but owe just $400 in taxes, you’ll receive a $400 tax credit.
For state and local incentives, check the website for your local utility as well your local and state government and energy office to see what documentation is required. When in doubt,
keep all of your records and receipts!
ENJOY YOUR NEW ENERGY-EFFICIENT COMFORT!


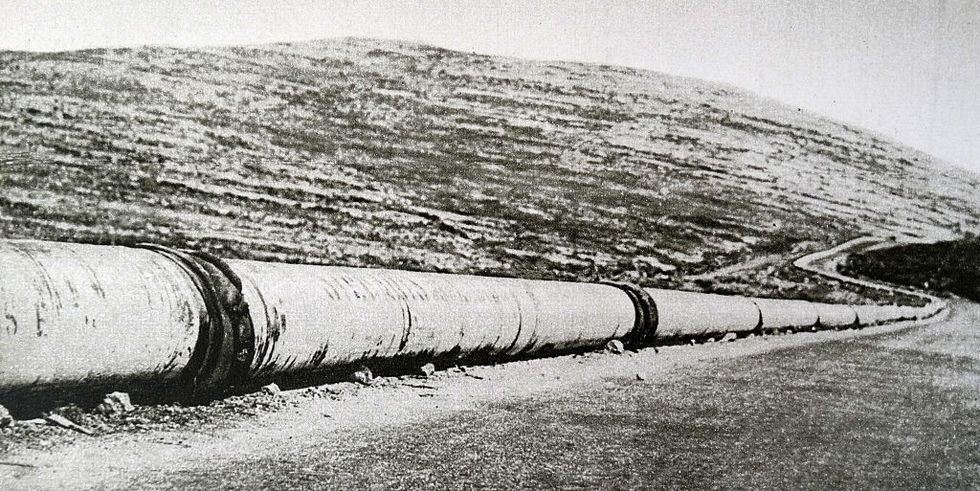 An oil pipeline built in 1926 from Syria to Iraq. A century later, another may be coming. Universal History Archive/Universal Images Group via Getty Images